Welcome! All words and images here are for your visual enjoyment, but please, even though it's only for your personal use, ask me first for permission to alter, copy or re-publish any words, images, artwork, photos or web design elements from this blog as they are Andrew Borloz' property, duly protected by international and US copyright laws. Thank you so much for respecting my property ownership.


Showing posts with label Stencils. Show all posts

05 June 2016

Second Art Postcard Marathon 4 - 5 June, 2016


After creating 18 art postcards (shown above) last week which took me between 30 to 60 minutes each plus time for clean-up, I decided that there has to be a better way to produce more within a shorter time. Rather than starting from scratch for each postcard, I came up with a plan for one big piece of artwork that can be roughly cut up and trimmed later.
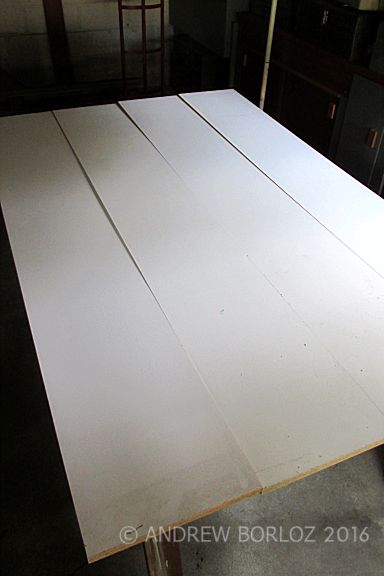
Last Saturday morning, I set up a temporary table using two sawhorses and four shelves (each shelf measures 11.75 inches wide by 72 inches long). I then rolled out a large white paper (available from art supply stores) which is larger than the width of the table. I also pulled out the acrylic paint, stencils, blocks, carved stamps, paper towel, and all kinds of mark-making tools.
Instead of covering the whole surface with gesso, I would apply gesso (white, black & clear) on certain areas, using different techniques such as stamping, brush strokes, or even stenciling.
After the gesso have dried, I started apply acrylics (craft and artist grade) in light or neutral colors on certain spots.
I kept on adding colors until I had most of the surface covered. Once I was satisfied with the general coverage, I started the stenciling process, usually with darker or lighter colors depending on what color I was stenciling on.
I kept on building layers and layers of colors, paints & stencils until I'm satisfied. I then started gluing the collage materials on the paper with Mod Podge - mostly newspaper and deli paper that were once used as underpaper. I also used paper towels that were used to wipe or remove the excess paint from the artwork.
After they have been dried overnight, I took a quick look and see what needs doing. I decided that I would use some paste paint, water-soluble colored pencils, and paint markers. I also did several block printing in certain areas.
I decided to leave some areas blank so that I can either add more collage, paint, marks or even stencils after the whole thing was cut up into smaller pieces. Before I started to cut the paper up, I took close up photos for digital print-outs so that I can use it as collage materials for other projects.
Here are a few:
 After I took several photographs of the whole piece, I cut a rectangular hole (6 inches x 9 inches) from a large piece of white paper so that I can use it as a "cropping tool" to find the sweet spots on the painted paper.
I moved it all over the place to find good compositions, and as soon as I find one, I draw the lines with black paint markers and then move on to other area for another one. I don't have a fast and hard rule for finding the good compositions, but I just simply keep on moving the cropping tool until it "looks" good or interesting to me. You can see the black lines in the photo below - they don't always lined up with each other.
 Once I outlined all of the areas to be cut up, I used a pair of sharp scissors and happily cut them - I don't even think about whether it was good one or not - I can always make it better by adding another element or two.
I saved and added all of the trims, scraps and small extras to my current collage stash.
I am very happy to report that I have 36 rough cut pieces (approximate size: 6 x 9 inches) that will be later trimmed down to 5.5 x 8.5 inches after more details & finishing touches have been added. It took me only six hours to produce all of them.
The stencils that I used in the above project are from Stencil Girl Products (including mine), Green Pepper Press (Michelle Ward) and Donna Downey Studios. Other stencils were either cut by me or reused from manufactured products or fabric. It was a quick and fun project - I will later show the finished postcards one at a time.

*Full disclosure: Andrew Borloz does receive compensation for his stencil designs from Stencil Girl Products in the form of royalties, however, he does not receive any form of compensation or "free" product from other designers, manufacturers or retailers.

31 May 2016

Art Postcard Marathon 27 May - 30 May 2016

Last Thursday, (26 May 2016) as I was going through the piles of stuff that I meant to sort and organize, I came across a good number of advertising postcards that I had meant to re-use as "art postcards" instead of using expensive watercolor paper. I finally decided that I would spent some time making them during the Memorial Day weekend.
At first I was going to do one postcard per day, but I have come to realize how quickly I was able to create them in a short time, so I ended up making three per day for a total of 12 postcards. I spent between 30 - 45 minutes per card.
Each card measures 5.5 inches by 8.5 inches which is a good size for me to create art postcards using various media and techniques. Shown below is the first three cards that I created last Friday, using my own stencils, found hand-decorated paper, and color photocopy of my own digital work. I utilized stenciling technique, paint markers and craft acrylic painting techniques to creative decorative effects.
The next day, I decided to use different painting techniques in creating the next three postcards. I also used the stenciled tape in one of the postcards below, and used paint markers quite heavily in above and below postcards.
The next set of postcards created last Sunday - again, I used different methods and media. The second one (lower left) was done with spray paint - two stencils were used: Crafters' Workshop and Stencil Girl Products. The last card (lower right) is the one that I used the paint markers the most in this group.
The last three postcards were done yesterday which was Memorial Day. To commemorate this holiday, I decided to utilize the elements of a U.S. flag with the rural buildings in the background. The stencil that I used for the background will be made available from Stencil Girl Products next month of June. I also used two cardboard stencils from Martha Stewart Crafts for stars and strips. The next postcard was created with carved stamps that I accumulated over several years but were stored in a storage box and forgotten until yesterday. The last one was done with stencils made from found objects. Sticky foam rounds were used to created these round dots.
It was an excellent opportunity for me to refresh my knowledge and skills that I have accumulated and developed over the past several years. These art postcards provided me the means to exercise my creative muscles and at the same time, to have fun and enjoy the process. Shown below is a digital collage of all of the 12 art postcards that I created.

 *Full disclosure: Andrew Borloz designs stencils for Stencil Girl Products and receives compensation for them via royalties. However, no compensations were received for the use of the stencils, paint markers, and craft acrylic paints from other companies. 


21 May 2016

My Past Stenciling Experience - A Personal Odyssey


As I was going through the posts that I have created since 2007 (and most of them were taken off the blog), I came across several posts which showed my past experience with the stencils before I start designing them for Stencil Girl Products.

Three posts were originally published on February 10, 2008 (Stencil Talk); March 12, 2008 (Stencil Talk II); and April 26, 2009 (Spray Paint Stencilry). I combined them into one post here and edited to make it more current:

I just wanted to talk about my humble beginnings with stencils - nothing fancy or fabulous to show you today. I was busy trying to get things done for several long distance trips as I was sorting and cleaning out the boxes and boxes of art supplies today. I finally found the stencils that I have been trying to find for several weeks. It was my first set of cardboard stencils (over 50 years old!), and I had wonderful memories of stenciling during my childhood.

Also, on another large table, I was going through piles and piles of stuff, and I came across a large manila envelope. It was my father's and I had forgotten that I inherited his collection of stencils dating back to late fifties - early sixties (~1958-1963). Several of the stencils came from a stencil manufacturer, Stenso, and I found its interesting history written by Jeffrey Levine in Larabie Fonts' website.
Front & Back of the Package - Note the price!!

And I also spent quite bit of time in my father's workshop, staring at the black stenciled last name. My father stenciled it on his square workbench, and it is still there. He also stenciled our last name on the trash cans as well.

And I found another artwork in the basement - I did it when I was a senior at my high school back in 1974. I actually created and cut the stencils for this artwork - the petals, leaves, and the vase.
The whole thing was done with tempura paints. I wish I could say that I did the whole thing by myself - the art teacher was not a patient person. He did the shading and the shadows on the vase.
Eleven years have passed by before I did the stenciling again. In 1985, my mom wants the decorative border stenciled in the living room, so I did that on two side walls (photo of one wall above). And I suggested stenciling on the door frame, too (photo below). The oil paint sticks and stiff stencil brushes were used in both projects.
And it was not until the fall of 2007 did I do more stencil work - in a class with Michelle Ward (spray paint techniques) at Valley Ridge Art Studio and later at home. A year later (2008), I started getting more serious about incorporating stencil techniques in my work.
Since some of the stencils can be very expensive especially the ones used for automotive paintings. One day, I was food shopping and I saw a laundry basket with holes of various sizes, and I fell in love with it so I bought it to be used as stencils (only $4.99!!)

I cut the side off with a box cutter - it's very soft but one does need to be careful when using a box cutter.

Inside of straight cutting, I scored the lines around the edges and then bend the edges down- they come right off.

An improvised stencil completed and ready to be used as stencil or template. I used this template to draw the circles in one of my journal pages (full page on the right side and close-up on the left side below).
About a year later (April 2009) I was taking Mary Ann Moss' on-line class, Pure Experimentation - Stencilry. The class already started three weeks later after I registered for it. For two days, I watched three weeks' worth of videos.

Although I was not able to hear what she said, I figured out the techniques just by watching. After watching the videos for too long, I decided to get up and get started despite the record temperature outside here in northern NJ (it was 96 degrees!).

I happened to have black foam core boards, and two buckets of spray paint. I can't remember where I put my stencils so I settled for the improvised stencils that were cut from the laundry baskets. Plus, I found the punched metal sheet in the garage.

I turned the foam core board over and did another background.

To make a portfolio for my future collage pieces done with stencils, I cut one piece and then cut it half. I should be using duct tape, but instead I used the packing tape with barbed wire. I love it!

It's pretty simple and sort of plain compared to other students' work, but I do plan to add more layers later in the near future. Here's the inside:

Today (May 21, 2016): By looking back, I can see how much I've grown and have amassed a good amount of experience and basic skills for stencil work. Over the years since the above posts were published, I have develop stencil design techniques on my own. They provided me the foundation for the design work that I did for Stencil Girl Products since the time I was at Penland School of Crafts back in 2010. In the near future, I will be writing more about how I came up with the stencil designs done for Stencil Girl Products. Stay tuned!

20 May 2016

Stenciled Cardboard Frames - Part 3

After I created the two tutorials in the past two posts on how you can create your own corrugated cardboard frames, I am still creating more frames with the other stencils that I designed for Stencil Girl Products. Here in this post, I am presenting to you four more new ideas.

Shown below is one set of frames created from one piece using X & O stencil and Chevron Set #3 stencil. So far, this is the only one that utilizes two stencils instead of just one. After creating the background with black & white gesso, I started first with X & O stencil and then the Chevron. I then used the X & O stencil again on top of the Chevron - making some of the images "float" above the Chevron. The result is a "layered" look.


The next one (below) in a series of six frame designs is simpler than the above. I created the background first using craft acrylic paints in various light or medium colors, and then placed the Curvies Dash Stencil over the top, and applied the darker acrylic paints in three colors - one of them metallic.


The fifth one in a series of six different designs (two of them are already shown in previous posts) utilizes the same technique as above but in reverse - dark colors for the background and light colors for the stenciled pattern done with Crossed Rounds (top of the three designs on the stencil). Yes, I had to reuse the same top pattern, using the top row as a "register" for alignment of the next repeat.


The last one in this series utilizes black, white and clear gesso for the background and four craft acrylic colors in various shades for the stenciled pattern - one color for each set within the Mini-Dots stencil. I placed this stencil on the top, and applied four colors, then I moved the stencil down and applied two colors, and then move it back up, placing the bottom sets over the top of the stenciled dots. If you're not sure what I'm talking about, do please let me know by leaving your comments here.


I hope I have inspired you to create your own frames, and I'm still creating more designs using the other current designs available from my page in Stencil Girl Products.

*Full disclosure: Andrew Borloz does receive royalties from the sale of the stencil shown above directly from Stencil Girl Products. No promotional fees were paid to Andrew Borloz for promoting his own stencil designs and others.

15 May 2016

Stenciled Cardboard Frames - Part 2

After I created the first two frames with one stencil, I decided that I would create a collection of cardboard frames using my stencil designs available for purchase from Stencil Girl Products' website. This time, I'm using the Wheel Spokes Set #2 stencil for this second set of frames.


I was trying to figure out which design and colors to use for the second set. As I was doing my laundry today, I saw a load of dirty shirts and thought that it would make a great color scheme.


So, based on the colors of the shirts, I picked the colors from my craft acrylic paint collection. I then pour a few drops of white gesso and spread the paint drops with a wallpaper smoother.


I then poured a few drops of black gesso and used the same technique as the one done with white gesso. I then poured a few strings of cream-colored acrylic along the edge and smeared them over the black and white gesso. I allowed the top surface to dry a little bit and then I placed a piece of paper towel over the slightly wet paint to remove some off the top layers of gesso paint.


I aligned the top of the Wheel Spoke Set #2 stencil with the top of the cardboard, and covered the bottom half of the same stencil with a piece of paper. I then poured lighter shades of blue-green colors onto the paper plate.


Using the cosmetic sponge wedge, I randomly apply the color to the dots - lighter colors for the big dots and darker color for the small dots.


I didn't worry about the precision or the bleeding as I wanted to achieve the "grungy look" for this board. I removed the stencil and moved to the right - I aligned it by using the right column of big dots as a guide and also moved down. I completed the whole piece in clockwise manner.


I then poured some darker colors onto the paper plate for the second layer of stencil. Starting at the bottom right, I used the bottom half of the stencil (wheel spokes) and applied darker colors on the big dots and lighter colors on the small dots. I covered the top half of the same stencil with a piece of paper as a mask.


I moved the stencil clockwise and applied the paint. I then dry the whole piece with a heat gun.


After studying the position of the stencil, I decided that I would cut two frames from this one piece.


I'm very pleased with the result, and since I had so much fun with it, I've decided to start a series of frames. Looking forward to making more and I will show them to you later.

You can purchase the Wheel Spokes Set #2 on-line from StencilGirl Products here.

*Full disclosure: Andrew Borloz does receive royalties from the sale of the stencil shown above directly from Stencil Girl Products. No promotional fees were paid to Andrew Borloz for promoting his own stencil designs and others.